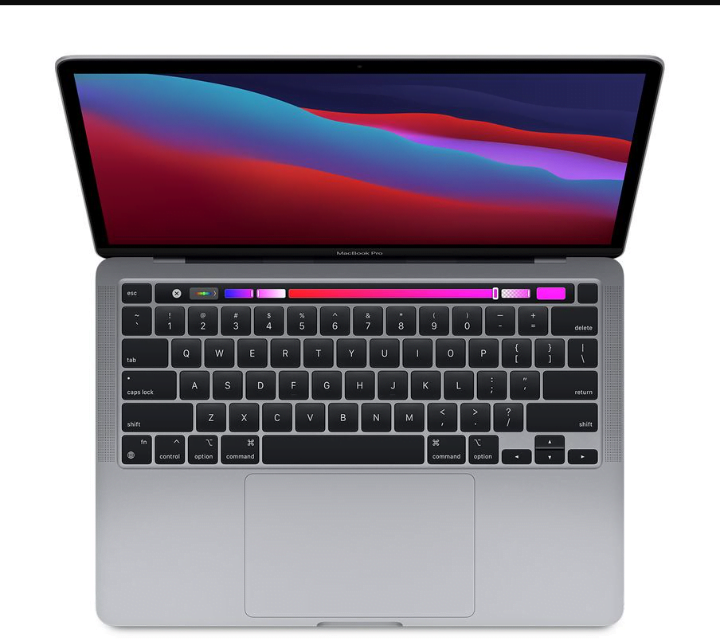
If you found yourself in a circle where you can and can only keep pace with your schedule by taking quick screenshots on MacBook, or screen recording, you are welcome to the vivid description of how you can do that.
Taking a screenshot of your Macbook comes in different formulas depending on the type and how you want to take the screenshot on your MacBook. That is whether you want a portion of the screen, the entire screen or the window screenshot.
Doing the screenshot comes with options to edit, delete, rename or chose the preferred folder you’d love to save your screenshot or screen recording. And also two ways you can do the screenshot – that is using the keyboard shortcut and using the screenshot toolbar. Stick through to the end and learn more tips aside from the screenshot and the screen recording.
HOW TO TAKE SCREENSHOT ON MAC USING KEYBOARD SHORTCUTS.
Press SHIFT + COMMAND + 3
This formula captures the entire screen of your MacBook. The screenshot appears as a thumbnail in the bottom right corner of your screen. If you failed to click and edit to choose where to save it, it will automatically be saved on the desktop by default.
PRESS SHIFT + COMMAND + 4
This combo together turns your cursor into a crosshair, you can now move it to where you want to start the capture of the screen portion from. Click and hold and hold to cover the space you want to capture. Satisfied with the portion covered, you can now release your mouse. The screenshot will be automatically taken and saved on the desktop.
Should you change your mind during the dragging and wanted to cancel the screenshot, press the Escape key on your MacBook to cancel the command.
Interestingly, there are more options up for you before you release your mouse or trackpad.
Press and hold the space bar (after dragging to highlight an area but before releasing the mouse button or trackpad): This locks in the shape and size of the selection area but lets you reposition it on the screen. It’s very handy if your initial selection area is off by a few pixels; just hold down the space bar to reposition it before releasing the mouse button to snap a screenshot.
Press and hold the space bar (after dragging to highlight an area but before releasing the mouse button or trackpad): This locks in the shape and size of the selection area but lets you reposition it on the screen. It’s very handy if your initial selection area is off by a few pixels; just hold down the space bar to reposition it before releasing the mouse button to snap a screenshot.
Without releasing the mouse button, release the Shift key and hit it again to reposition the right edge of your selection area. You can toggle between moving the bottom edge and right edge by keeping the mouse button or touchpad engaged and pressing the Shift key.
HOW TO TAKE SCREENSHOT ON MACBOOK USING SCREENSHOT TOOLBAR PRESS SHIFT + COMMAND + 5
A relatively new shortcut command introduced in MacOS Mojave (2018), this combination calls up a small panel at the bottom of your display with your screen capture options. There are three screenshot buttons that let you capture the entire screen, a window or a selection of your screen.
Recommended article: Know This: What VPN Can Do And Cannot Do
Likewise, the two video-recording buttons let you record your entire screen or a selection of it. On the left is an X button to close the screenshot panel, but you can also just hit the Escape key to exit out.
On the right side is an Options button. It lets you choose where to save your screenshot — Desktop, Documents, Clipboard, Mail, Messages or Preview — and set a 5- or 10-second delay so you can line up items that might otherwise disappear when you engage your screenshot tool.
By default, the Show Floating Thumbnail option is enabled, which puts a little preview thumbnail of your just-capture screenshot in the lower-right corner of your screen, similar to the screenshot procedure with iOS. Unlike your iPhone ($899 at Amazon), you can turn off this preview thumbnail on your Mac. Lastly, you can choose to show your mouse pointer in a screenshot or video.
If the screenshot panel is in your way, you can grab its left edge and drag it to a new spot on your screen.
If you’ve got the 16-inch MacBook Pro or another model with the Touch Bar, did you know you can take a screenshot of what’s currently showing on the Touch Bar? Just hit Command-Shift-6 to take a very wide and skinny screenshot of your Touch Bar.
EASY ANNOTATION WHEN TAKING SCREENSHOTS ON MACBOOK.
If you embrace the Floating Thumbnail, then you’ll gain quick access to Markup tools to annotate your screenshot. You can swipe the Floating Thumbnail away or just let it slip away on its own and it’ll be saved to the spot you last saved a screenshot. Click the Floating Thumbnail and it’ll open in a Markup View preview window (but not Preview) with all of the markup tools you get in Preview.
You can right-click the Floating Thumbnail to:
- Save the screenshot to your desktop, Documents folder or clipboard
- Open it in Mail, Messages, Preview or Photos
- Show in Finder
- Delete
- Open in in the Markup preview window described above.
- Close (and save)
HOW TO MAKE SCREEN RECORDINGS ON MACBOOK
This screen recording technique we are about to learn can work on any Mac computer, it can work on laptops, iMacs, iMac pros. This technique comes with your Mac computer, you don’t have to download or install anything from anywhere. This is the first one, let’s hop into it.
1. SCREEN RECORDING ON MACBOOK WITH QUICK TIME PLAYER
This comes with your Mac computer as said earlier, all you have to do is to hit your search button on the Mac computer and type in the name. It will pop up topping the list if of search results. By clicking on it, you have activated it as it will sit right on your desktop corner [ anywhere you set it, I am having it at the top left corner of my MacBook ]
Right next to the Quick Time player, click files which will give you options of New Movie recording, new audio recording and new screen recording. Click on screen recording because that is what we are handling right now.
After clicking new screen recording under files, you will see a dash around your screen as a highlight what the screen recording will cover which is obviously the entire screen but you can choose to change that and select a window or even a portion of the screen by using the panel with capture options and screen recording options.
You can also click on the capture panel at the bottom of your desktop to see where the recorded files will be saved, set a timer to begin the recording and the microphone to choose [ note, this affects your sound quality greatly, the default will have it set at the built-in microphone which is terrible but you can go for some better microphone to buy ].
And then to record, you just have to click the record button on the capture panel and if set to a countdown timer, you will have to wait for it to hit zero for you to start recording. You get to know whether a recording is in progress or not is looking out for a stop sign at the top centre of your screen.
2. SCREEN RECORDING ON MACBOOK WITH OBS
This is an app that includes a lot of things when it comes to screen recording. It allows you to record on any device, any screen and you can also use it to stream online. OBS is completely free as well but you have to download the Mac version for your MacBook and
You can follow this tutorial to learn how to use the OBS in recording your Macbook screen and other things.
Thanks for reading on globecalls.com. A share and comments are highly appreciated.


