Technology is evolving, things are changing, knowing how to take screenshot on PC will afford you many fast routes in some doings on your computer: saving documents or images, achieving long distances tasks through pictorial directives, etc.
Screenshotting becomes useful when you want to preserve some vital documents or images online, or save the interesting pic, air tickets, and movie tickets via some faster methods.
Whatever method you choose, the ability to snatch those moments immediately from your computer screen and save it as image files is one of the game-changers of the modern computer age.
In this article, we’ll take you through the entire procedures on how to take screenshot on PC operating on Mac and Windows OS by pressing a few keyboard buttons and using tools
What Is Screenshot
Screengrabs or screenshots are the unique processes of capturing images or any items of interest on a computer desktop or PC via in-built tools and keyboard clicking
How To Take Screenshots On PC
Almost all modern computer desktops and PC run on Windows or Mac operating systems – you can screenshots by simple keyboard clicks and some in-built tools
Images or any documents of interest are usually screenshotted on a computer by clicking on the PrtScn, Print Scrn button, or some combination of keys and screenshotting tools.
The Prtscn or Prt Sc button or any screenshot tools will either allow you to capture your entire screen or a selected portion of the items display on your home screen.
By clicking this button, it will essentially copy an image of the screen to the clipboard.
The images copied will not automatically show; you have to open Word, Paint, or any other image editing program to view, edit or save the image.
How To Take Screenshot On PC With Windows operating System
Windows operating system provides six procedures for capturing images on computer devices.
The six procedures are Print Screen (PrtScn), Alt + Print Screen, Win + Print Screen, Win + Move + S, Win + G, and Win + Alt + Print Screen.
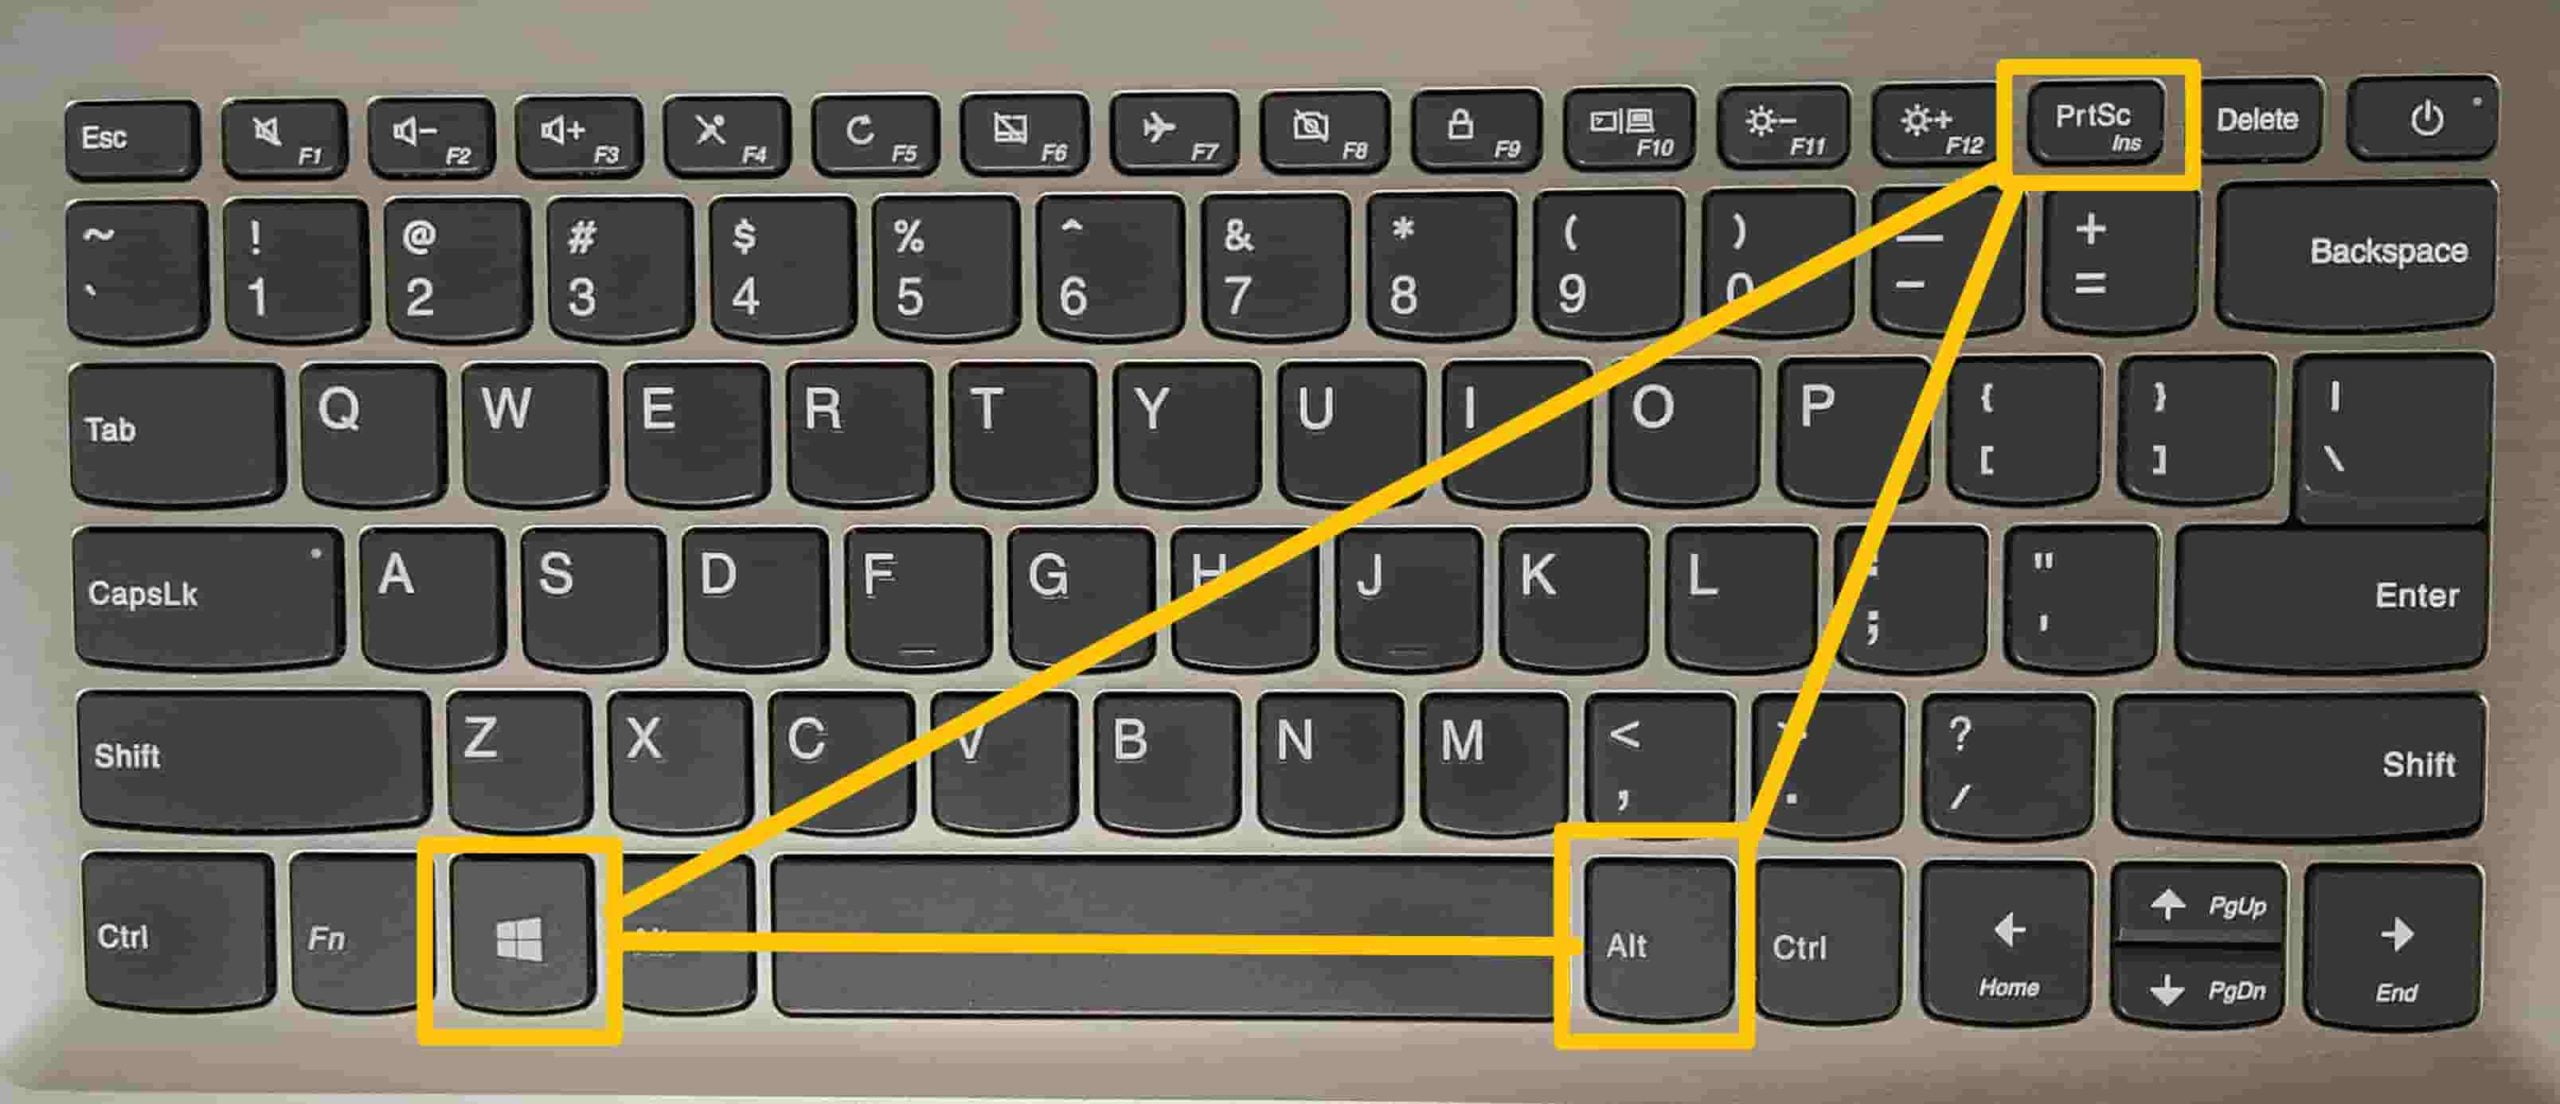
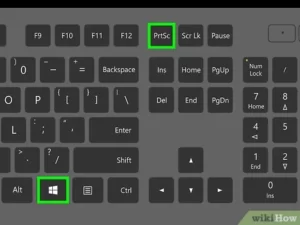
• Print Screen (PrtScn): This function key screenshots the entire image that is displayed on the screen irrespective of the connection and sends them to the clipboard.
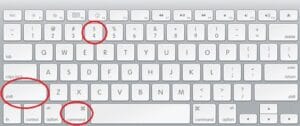
The Print Screen key is naturally located at the top right of your keyboard. This button will allow you to capture your entire desktop screen by simply clicking on it. Refer to the image above
• Alt + Print Screen: Rather than screenshotting the entire screen, this functional key captures only the active window instead of the entire screen display (i.e. both screens at once).
Depending on the keyboard model, the location of these function keys varies from each other. The targeted image that will be captured will be sent to the clipboard.
• Win + Print Screen – The difference between these function keys and the above-mentioned is that it screenshots the entire screen and saves the images at the same time.
• Win + Move + S – This option screenshots the entire images display on the PC screen by the use of an in-built snip and sketch tool.
Whenever this tool is called to action, the computer screen changes to provide a box with options to choose from depending on what you want to archive.
The toolbars provide rectangular, freeform, window snip, and full-screen snip options. This method does not save screenshots; rather, it sends them to the clipboard.
• Win + G – This option of screenshot works by lunching or opening Games on the Xbox Game Bar. After the game is open, you can click on the camera icon to screenshot.
This tool will capture the desired images and save them directly on your files.
• Win + Alt + Print Screen –This is another method that is functioning via game bar operation.

To use this method, you have to make sure the screenshot feature of the game bar is toggled in and it will screenshot the entire screen.
How To Take Screenshots On PC Using Windows 10
The Full-Screen Method
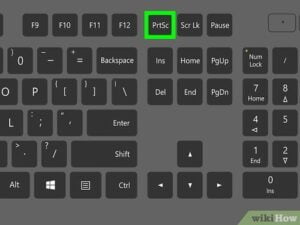
• Locate a key on your keyboard that is labeled PrtScn at the top right corner of the keyboard.
The print screen key is usually abbreviated as PrtScn or prtSc.
• Click on the key button to take a screenshot of the entire computer screen
• Instantly, the button will enable you to capture your entire home screen to the clipboard.
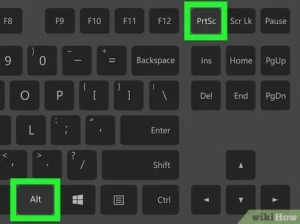
Alternatively, you can still achieve similar results by clicking on a key labeled with Windows logo and Print Screen at the same time on your computer keyboard.
Immediately, your computer screen will dim for a moment to indicate a successful screenshotting of the entire PC screen which will be saved in your pictures >> screenshot folder.
How To Take Screenshots On A PC Using Snip And Sketch.
Partial Screen Method
Snip and Sketch is Microsoft’s latest version of screenshotting tools. The tool is usually located from the Start Menu or by typing Win + Shift + S on your keyboard.
Snip and Sketch tools are usually called upon when screenshotting a selected portion of it, rather than an entire computer screen.
In October 2018, Windows Operating System introduced the new default feature update, called Snip and Sketch into their built-in components
This tool effectively enables users to capture selected portions of their screen without the need of using third-party applications.
If you want to know how to use the Snip and sketch tools effectively, these steps below will direct you on how to screengrab and save with the tool.
• Click on the Windows key + Shift + S simultaneously.
• After clicking on the key, Your computer screen will fade to a white overlay and your cursor will change from a pointed cursor to a crosshair shape cursor.
• Select the portion of the screen that you wish to screengrab.
• The snippet tool will disappear from your screen to enable screenshotting onto your computer’s clipboard.
• On the tools bar of your computer, search and open an image editing program such as Microsoft Paint, GIMP, Photoshop, and PaintShop Pro will all work
• Click on open a new image and tap CTRL + V to paste the screenshot image
• Click on Save to save the screenshot as a JPG or PNG file and place it into an easy access folder.
How To Take A Screenshot On PC Using Windows 7, 8 And 10
Since almost every modern computer laptop and desktop operates on Windows Vista, Windows 7, 8, or 10, the snipping tool is an integrated built-in feature that comes with it.
On your desktop or laptop computers, the snipping tool is located within the start menu.
To access the tool for screenshotting, you have to follow the steps below.
• On Your computer toolbar, search for the snipping tool by typing the word
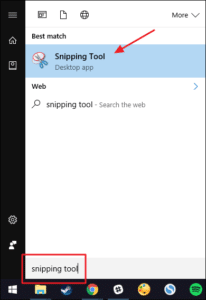
• As soon as the snipping tool appears, click on it
• The application will open with more optional information
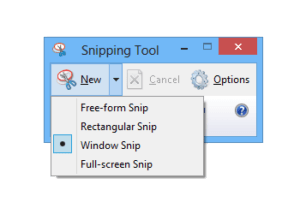
• Within the snipping tool application, click on “New” or CTRL + N to create a new snip.
• Using the crosshair cursor, drag the cursor to make a rectangular outline of the portion you want to screenshot.
• After clicking on the New icon for the screenshot, it will take you to another layer for further actions like Erase, highlighter, pen, pen color, send snip, copy, and save.
• After you are done with the editing, click on the save icon to save the screenshot as a PNG or JPEG file.
In addition to screenshotting in a standard rectangular form, the snipping tool also comes with several added features that allow you to switch modes:
• Free-form snip: This option gives you the opportunity of screenshotting in any direction, shape, or form-Circles, ovals, or figure 8’s are easily captured with the free-form mode.
• Window snip: Under this option, you can screengrab your active window with just a single easy click.
• Full-screen snip: This option allows you to capture the entire screen display.
How To Screenshot On PC With Mac operating System
On a Mac, you can click on some combination of keyboard keys to take a screenshot of the whole or partial display of the screen and save it by default as a PNG format file.
Follow the steps below to successfully screenshot an image on a Mac OS computer desktop and laptop.
• Click on the Command, Shift, and 3 keys at the same time, an image of your entire computer desktop screen will be screenshotted
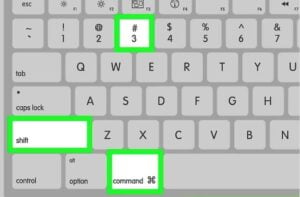
The screenshot images will be saved on your computer desktop named “Screenshot” with the date and time included in the file name
• Click on the Command, Shift, and 4 keys at the same time to take a screenshot of a selected area or portion of your screen.
This will make your cursor turn into a small cross. As soon as the cross appears, you can click and drag over the image in the shape as you wish to save it
• You can now open the image file and edit it. You can as well double-click on the image file on your desktop to open, edit, crop, and rename.
How To Split Your Screen In Windows 10 For Multi-Tasking
Every Windows 10 operating system computer has an in-built snap assist feature
The Windows 10 snap assist on computer/ PC allows you to split the computer screen into 4 different Windows sections.
The feature helps in organizing space on your screen more efficiently, helps with productivity and multi-tasking, and is very useful doing referencing and comparison
How To turn snap windows feature on :
• Locate the Windows start button
• Click on setting
• When the setting page appears, type the Multi-tasking
• As soon as the word appears
• Click on Multi-tasking
• Once the tool opens, make sure to set other related functions including toggle on the snap
• Close the multi-tasking page accordingly.
How To Split your screen for multi-tasking:
• Click and open the first Windows you want to split as a full screen
• Move your mouse up to the top bar
• Left click your mouse and hold
• Drag the Windows down and into the position you want it to be
• Move the Windows horizontally left to the right screen corner
• Still making the left mouse button held down
• The snap line will appear (1/2) screen
• When you see that the image is in the top right corner of the screen, indicating the 3rd right quarter, release the mouse.
• Repeat the same process by opening a new window you want to work with simultaneously
Recommended: Run Instagram On PC, The New Way
• Move mouse unto the top bar
• Left click mouse button and hold
• Move the window horizontally first and then to the left side top of the window and release the mouse
• The Window will snap into the place automatically
• Repeat the same procedures to split the window into the 3rd portion and the fourth portion is achieved.
Coupled with few things, this is how to take screenshot on PC. Hope this has helped you in working smart in the busier environment. Which of the formulas are you using and how well is it going? If this article does help you, a share and a comment are would be well appreciated. Thanks.