How to free up storage on your smartphone for smooth running and to gain more space for more files. Yes, too many files and apps slows than your device.
One may need to free up storage on his or her smartphone as often as possible as taking videos and photos of oneself for social media is the order of the day nowadays.
However, it is not only photos and videos for TikTok, Facebook, Snapchat, etc that fills up your smartphone. There are app data, caches, and unused apps. To free storage on your smartphone to the maximum, you must explore all means.
This is how to free up storage on your smartphone in 3 simplest ways without losing any file dear to you.
Free Up Storage on Your Smartphone Using Google File App.
1. Open your google file app on your smartphone.
2. Tap the ‘clean’ button under the selected junk files and unused apps to deleted and regain some storage space.
Since the app is made to manage your files and app, as soon as you open it, it will land you In the ‘Clean’ feature where junk files and unused apps will be suggested to delete and uninstall.
In the ‘clean’ feature, there are more suggestions to free up storage on your device, which include deleting duplicate files, blurry images, large files, WhatsApp files, etc. but in order not to lose any file dear to you, you must make sure you back up the folders that contain those files. Read on to know how to back up before deleting.
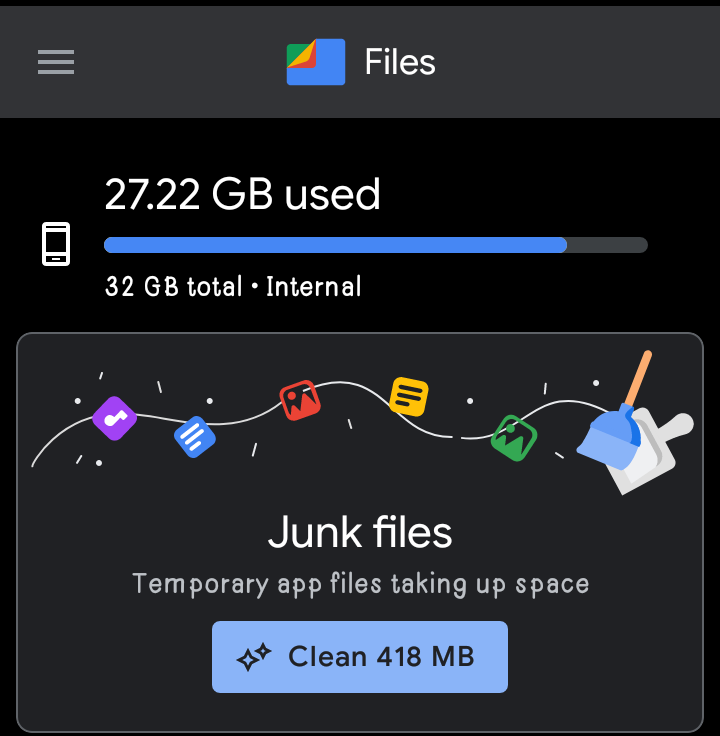
Preceding this feature, you can use the ‘Storage’ tab in your smartphone settings to rescue some more storage space.
Free Up Storage on Your Smartphone Using Storage Or Apps Section
In the Storage section or Apps, you can find out how much space an app is taking and then, decide to clear its cache or uninstall it if it has been out of duty for long or is no longer in use.
Note If you are using android version 12, you will see this feature in the ‘storage’ section but below version 12, and depending on your manufacturer, you are likely to find this feature in the ‘Apps & notification’ section.
- Now let’s get into it, firstly by the storage section.
1. In the storage section, tap on Apps. You will see a list of all apps installed on your phone.
2. Tap on any app to see the size being used by user data and cache. Two available buttons will either let you ‘clear cache’ or ‘clear storage’.
Note: It is ugly advisable to clear the cache only as the clearing storage will make you lose your user data ( files, documents, settings, passwords, and more ).
- With the Apps & notification section:
1. In the ‘Apps & Notification’ section, tap on ‘See All Apps’ to have a full list of your available apps.
2. Tap on any app to see the App’s info which includes Storage.
3. Tap on Storage, where you will have two buttons with cache to clear or storage to clear.
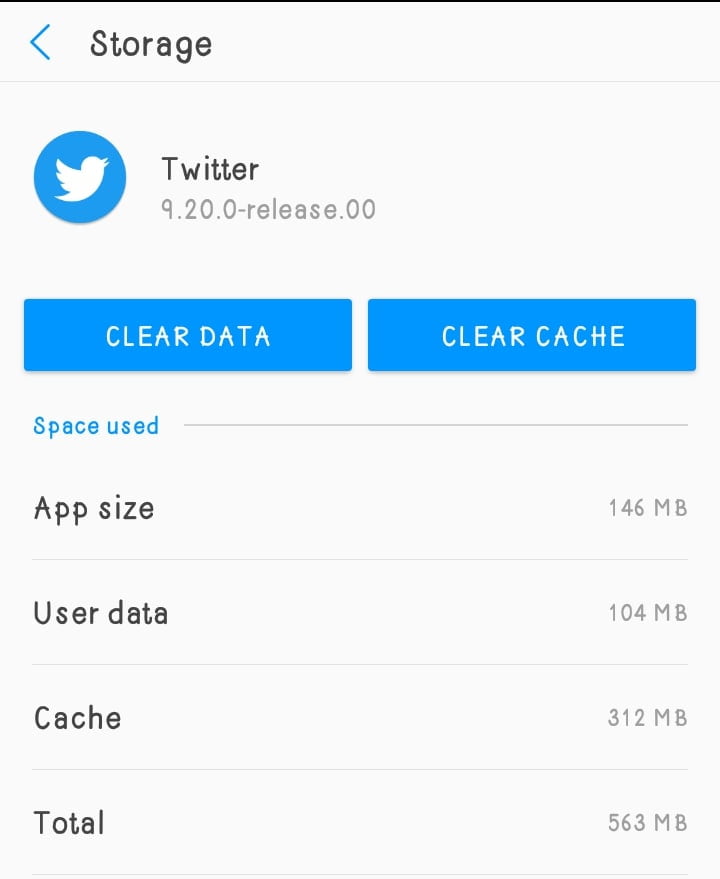
Another hidden feature is available for smartphone users with Android version 12.
This is a feature called Smart Storage, with this feature toggled on, photos and media backed up to google photos will not last over 60 days on your phone. It will be deleted permanently automatically. This is how to turn the ‘Smart Storage’.
How To Use Smart Storage
1. Open your google Files app.
2. Tap on the 3 parallel lines and the top left corner.
3. From there, click on Settings.
4. Among the options listed in the Settings section, tap Smart Storage to toggle it on.
And that is all for the Smart Storage, you wouldn’t have to take the hustle of deleting your already backed files. This feature does it for you.
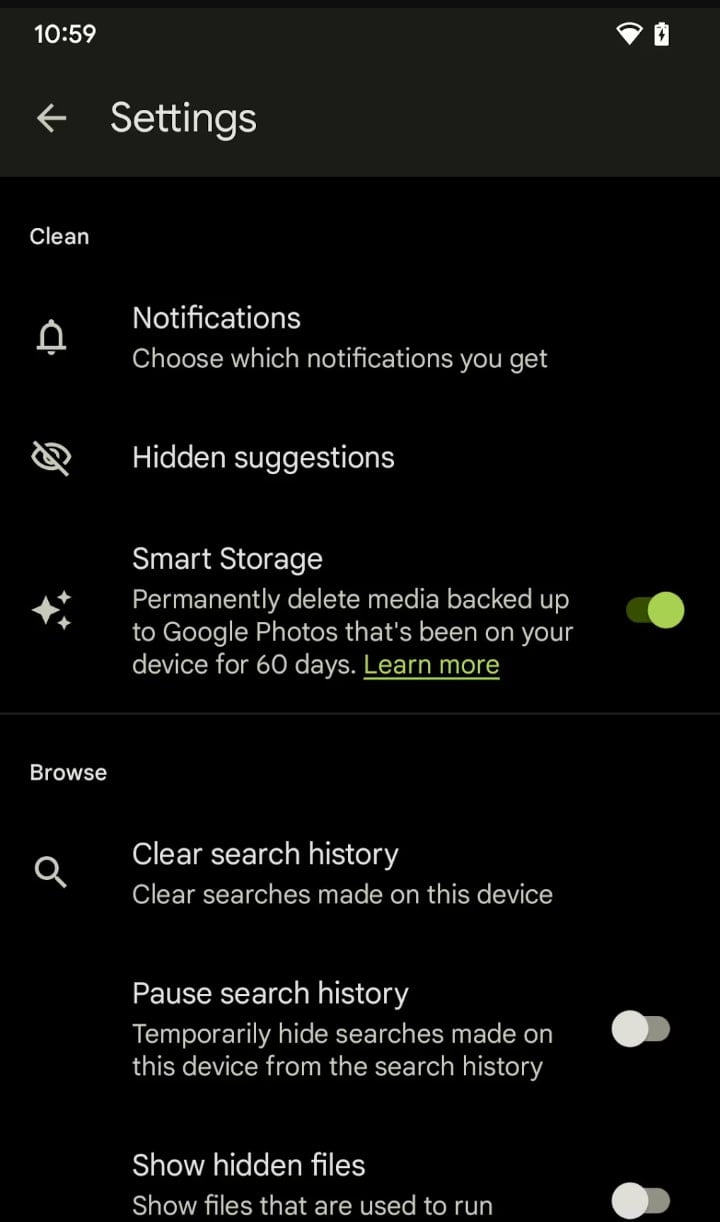
Free Up Storage on Your Smartphone By Deleting Unused Apps.
Forgetting apps unused on your smartphone is very common and easy to happen to everyone because as you use it was frequently, it won’t appear among the most frequently used apps on your phone.
The best way to fish out the most useless apps on your phone and hence delete them to reclaim much storage space is by the Google play store.
1. Launch your Google Play Store app.
2. Click on your profile icon at the top right cover of the app. There will be a pop-up list of information about your account and apps.
3. Tap the first option – ‘manage apps & device’.
4. Choose ‘Manage’ on the next page.
5. By using the sorting icon in the top right side of your app list, select ‘Least used’.
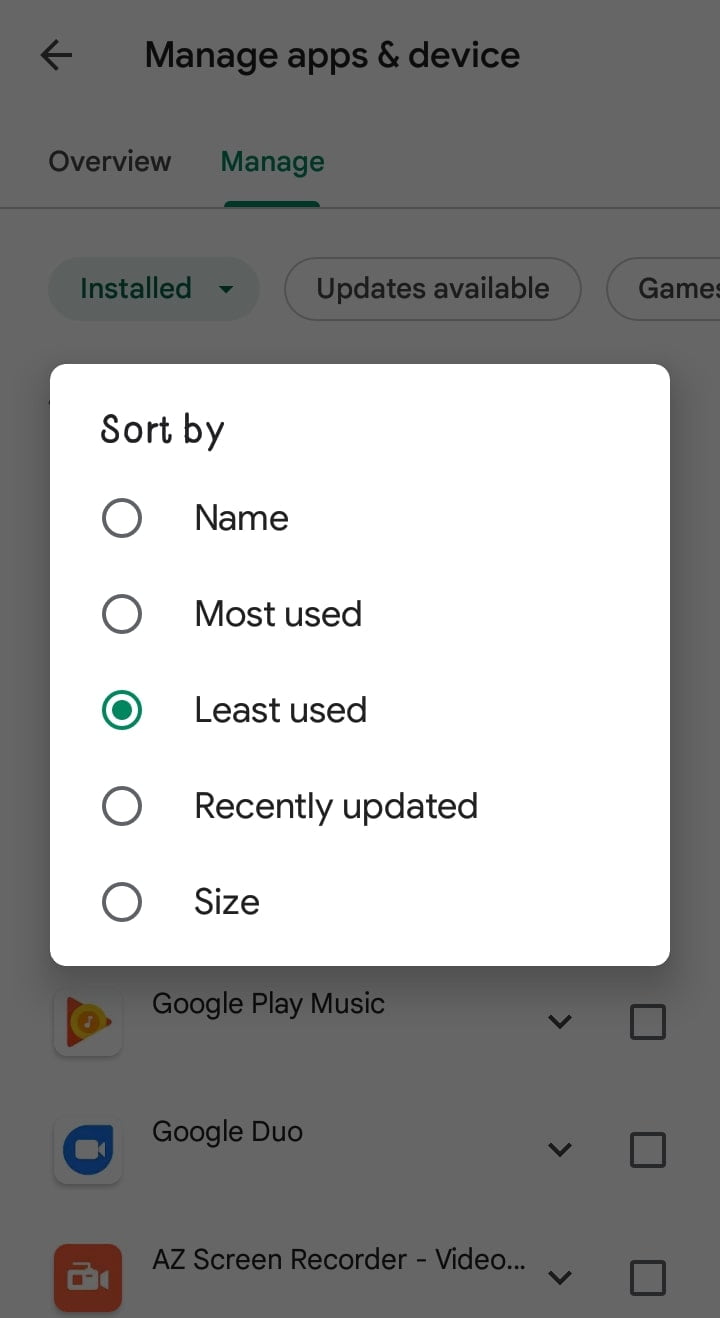
6. You will now have the apps list arranged according to the least used apps from top to bottom. You can now choose to delete those you don’t need anymore on the device.
Free Up Storage on Your Smartphone By Backing Up Photos.
Backing up photos on Google photos is another way of getting ‘rid’ of files on your device for more storage space. Most android phones users end up backing up their files because Google continually presents it to you and at times when setting up your Google account, you will have to toggle it on.
But if you haven’t, this is how to turn google photos back up.
• Open the Photos app.
• Tap on your icon in the upper right corner. If you’re backing up your photos, you should see a “Backup complete” entry in the drop-down menu.
• If you’re not backing up your photos, then select “Photos settings” > “Back up & sync.”
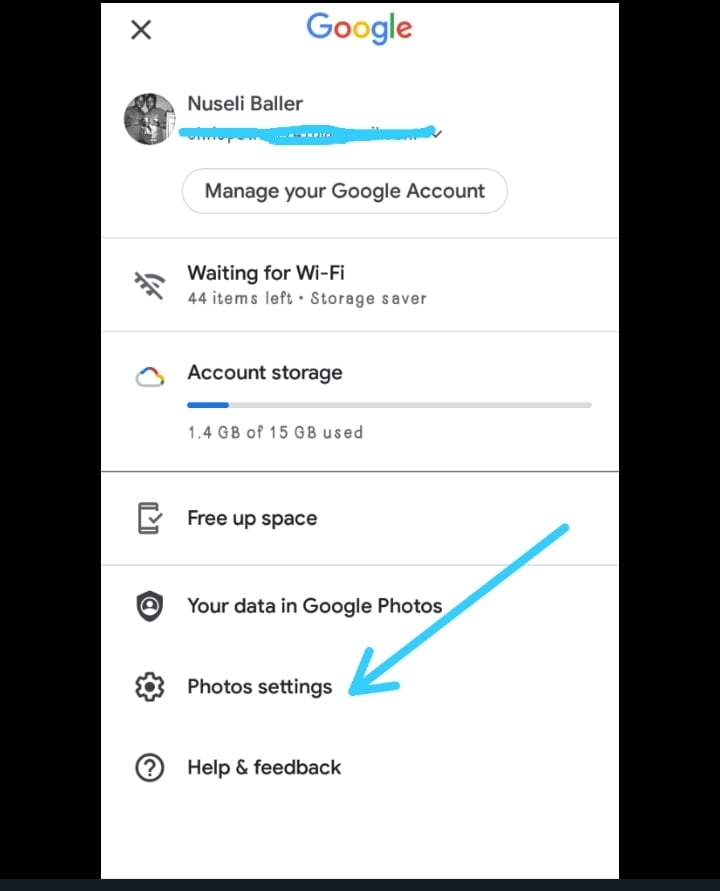
• Make sure that the “Back up & sync” toggle on top of the page is set to “On.”
• You should also check which account is listed under “Backup Account.” If you have more than one account, you can switch to whichever you want to use.
Now you can periodically delete your photos without fear that you may lose some files.
With all this done and you couldn’t get the storage space you need for that new project or file, then it is time for a new device.
Read: How To Do Reverse Image Search


