
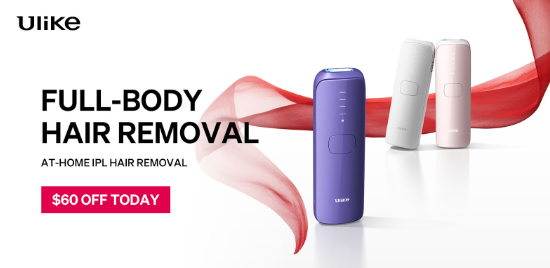
Step-by-Step Guide on How to Use the Ulike Hair Removal Device
Hair removal is a common grooming practice, and with technological advancements, there are now various devices available for at-home use. The Ulike laser hair removal device is one such product designed to provide a convenient and effective way to remove unwanted hair. In this step-by-step guide, we’ll walk you through the process of using the Ulike hair removal device for safe and efficient hair removal.
Step 1: Preparation
Before you begin using the Ulike hair removal device, it’s crucial to prepare your skin and the device itself.
Cleanse the Treatment Area: Start by cleaning the area you intend to treat. Ensure the skin is free from oils, lotions, and makeup. Dry your skin thoroughly.
Inspect the Device: Examine the Ulike hair removal device to ensure it’s clean and free from any damage. Check the device’s flash cartridge to make sure it’s securely attached.
Patch Test: If you’re using the device for the first time or on a new area, perform a patch test by treating a small, inconspicuous area of your skin. Wait 24 hours to check for any adverse reactions like redness or irritation.
Step 2: Select the Appropriate Intensity Level
The Ulike hair removal device typically has multiple intensity levels to accommodate different skin tones and hair colors. Start with a lower intensity level and gradually increase it if needed. It’s essential to follow the manufacturer’s guidelines for recommended settings based on your skin and hair type. Click here to visit Ulike for free guidance to know how to use IPL hair removal devices.
Step 3: Begin Hair Removal
Now, you’re ready to start using the Ulike hair removal device:
Power On: Turn on the device using the power button.
Position the Device: Hold the device at a 90-degree angle to your skin, ensuring that it makes full contact with the treatment area.
Press the Flash Button: When the device is correctly positioned, press the flash button to emit a pulse of light. You may feel a mild sensation of heat or a slight tingling during this process.
Overlap and Repeat: Move the device to the adjacent area, making sure to overlap the treated and untreated sections slightly. Repeat the process, flashing each area once. Avoid treating the same spot multiple times during a session to prevent skin irritation.
Step 4: Post-Treatment Care
After using the Ulike hair removal device, follow these post-treatment care steps:
Cool Down: Allow your skin to cool down for a few minutes. You can use a cool, damp cloth to soothe any warmth or redness.
Moisturize: Apply a gentle, fragrance-free moisturizer to the treated area to hydrate and soothe the skin.
Avoid Sun Exposure: For the next 24 hours, avoid direct sun exposure to the treated area and use sunscreen if necessary.
Repeat Sessions: Depending on your hair growth cycle, you’ll need multiple sessions to achieve optimal results. Follow the recommended treatment schedule provided by the manufacturer.
Step 5: Maintenance and Safety
To ensure the safe and effective use of the Ulike hair removal device, consider the following maintenance and safety tips:
Clean the Device: Turn off the device and unplug it before cleaning. Use a soft, dry cloth to wipe the flash window and keep it free from residue.
Store Properly: Store the device in a cool, dry place, and keep it out of the reach of children.
Follow the Instructions: Always follow the manufacturer’s instructions for proper use, maintenance, and safety guidelines.
Conclusion
The Ulike hair removal device offers a convenient and efficient way to achieve hair removal in the comfort of your home. By following this step-by-step guide and adhering to the manufacturer’s recommendations, you can enjoy smoother, hair-free skin with consistent use. Remember that results may vary depending on individual factors, so be patient and committed to the treatment process for the best outcomes.
Related posts:
 Transforming Your Body The Power of Effective Weight Loss
 Why Every Healthcare Practice Needs a Quality Medical Answering Service
 Unlocking the Benefits of Pawpaw Lip Balm
 Advancements in Autoclave Technology: Enhancing Sterilization Efficiency
 The Occupation of New York Hearing Doctors in Metropolitan Uproar Tainting the chiefs
 Why Handmade Fine Chocolate Deserves a Special Place in Your Pantry